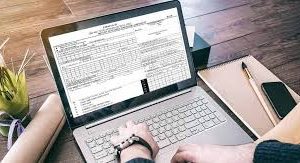
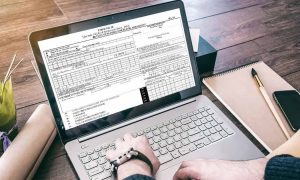
The next step after filing an Income Tax Return (ITR), is to get it e-verified. The Income Tax (IT) department will consider the income tax returns valid only after it is verified. There are several methods via which a taxpayer can e-verify the ITR.
Steps to begin e-filing:
Step 1: Login to the e-filing account at www.incometax.gov.in
Step 2: Select Income Tax Returns
Step 3: Click on e-Verify Return
Methods to e-verify ITR:
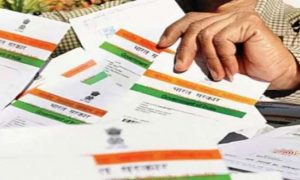
Method 1 – e-verification through Aadhar OTP
- Ensure that your mobile number and PAN is linked to your Aadhar
- Under the e-verify page, select ‘I would like to e-verify using OTP on a mobile number registered with Aadhaar’ option
- Once a pop-up appears, select ‘I agree to validate my Aadhaar details’
- Click on ‘Generate Aadhar OTP’ button, after which an SMS with 6-digit OTP will be sent on the registered mobile number
- Enter the OTP and click on ‘Submit’ – the OTP will be valid for only 15 minutes
Method 2 – e-verification via net-banking
- A taxpayer needs to have a net-banking facility to e-verify via this facility
- On the e-verify page, select ‘through net banking’ and click on ‘continue’
- Select the bank through which you want to verify the ITR
- Login to net banking of your account
- Under the tax slab tab, select the ‘e-verify’ option, after which you will be directed to the e-filing portal
- Click on the ITR form and click ‘e-verify’
Read More: Yet to receive your Income Tax refund? Know how to check your ITR refund status
Method 4 – e-verification through bank account
- A taxpayer needs to have a pre-validated bank account to e-verify via this facility
- Pre-validation of a bank account is a must for receiving income tax refund
- Select the bank through which you want to verify the ITR and login
- An EVC will be generated to the registered mobile number and e-mail ID with the pre-validated and EVC-enabled bank account
- Enter the EVC and click on ‘e-verify’
Method 5: e-verification through Demat account
- A taxpayer needs to have a pre-validated Demat account to e-verify via this facility
- Select the bank through which you want to verify the ITR and login
- An EVC will be generated to the registered mobile number and e-mail ID with the pre-validated and EVC-enabled Demat account
- Enter the EVC and click on ‘e-verify’
Read More: ITR filing last date: What happens if you miss March 31 deadline to file returns
Method 6 – e-verification through bank ATM
- This facility is available only via limited banks such as Canara Bank, Axis Bank, Central Bank of India, SBI, ICICI Bank, IDBI Bank, and Kotak Mahindra Bank
- A taxpayer needs to visit their bank’s ATM and swipe the ATM card
- Enter the ATM pin
- Select ‘Generate EVC’ for income tax return filing
- An EVC will be sent to the registered mobile number and e-mail ID
- Login to the account and select ‘I already have an Electronic Verification Code (EVC)’
Method 7 – e-verification using Digital Signature Certificate (DSC)
- If a taxpayer’s books of accounts are audited, the return must be e-verified using a Digital Signature Certificate
- Select the ‘I would like to e-Verify using Digital Signature Certificate (DSC)’ option on e-verify page
- Select ‘click here to download emsigner utility’
- After downloading and installing, return to the e-filing page
- Select the ‘I have downloaded and installed emsigner utility’ option and click on ‘continue’
- Select ‘provider’, ‘certificate’, and enter the password
- Click on ‘sign button’